

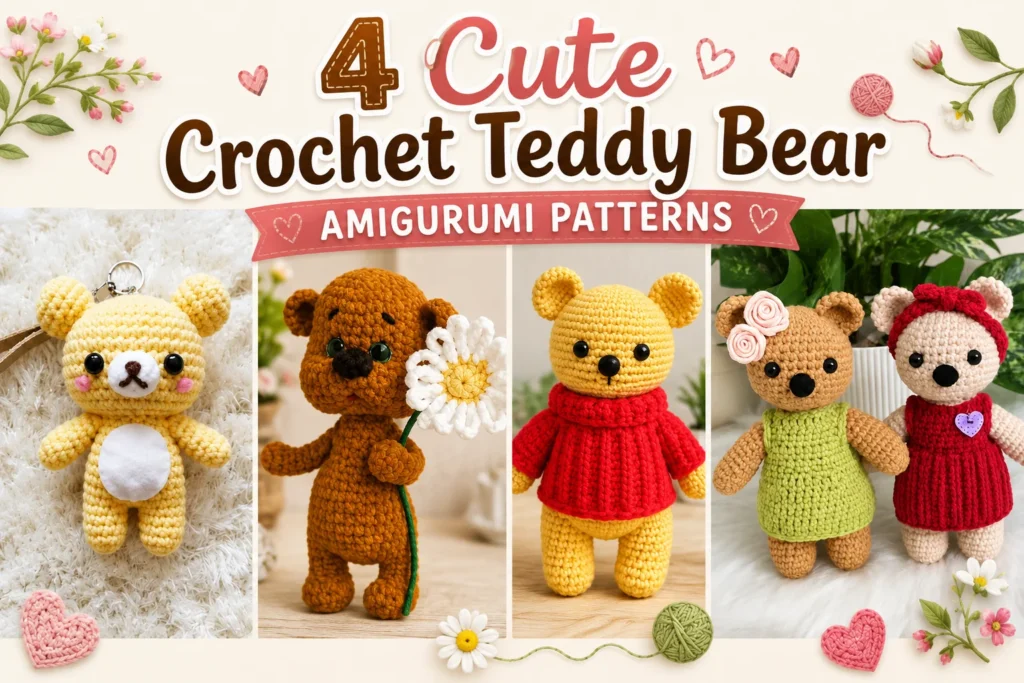
If you love making adorable handmade toys, these 4 Cute Crochet Teddy Bear Amigurumi Patterns are perfect for your next crochet project. Each design has a different personality, from a tiny Rilakkuma-style bear to cozy teddy bears dressed in colorful outfits.
These crochet bear ideas are great for handmade gifts, nursery decorations, keychains, and anyone who loves cute amigurumi.
1. Free Crochet Rilakkuma Amigurumi Pattern
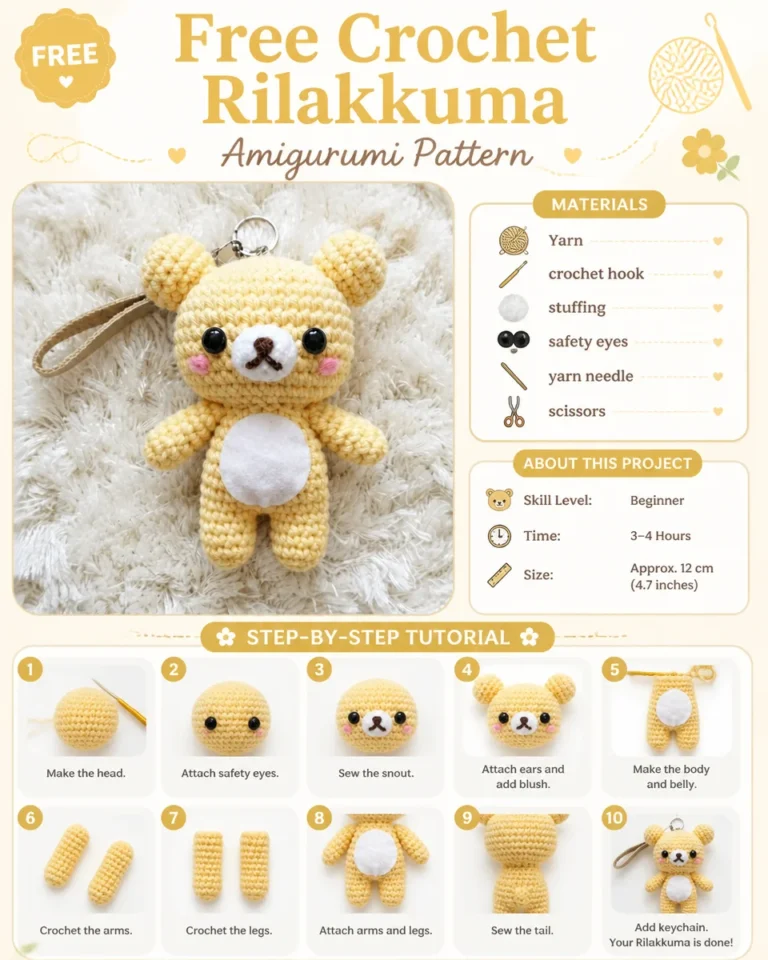
This Free Crochet Rilakkuma Amigurumi Pattern creates an adorable little bear with a soft yellow body, round ears, sweet facial details, and a white belly.
The finished bear is small enough to use as a cute decoration or even turn into a handmade keychain.
Materials
- Yarn
- Crochet hook
- Fiberfill stuffing
- Safety eyes
- Yarn needle
- Scissors
- Keychain ring, optional
Step-by-Step Instructions
Step 1: Crochet the rounded head using yellow yarn.
Step 2: Attach the safety eyes in an even position.
Step 3: Sew the small muzzle onto the face.
Step 4: Crochet and attach the round ears.
Step 5: Crochet the body and add the white belly.
Step 6: Make the arms and legs.
Step 7: Sew all pieces securely onto the body.
Step 8: Add the small tail.
Step 9: Attach a keychain ring if you want to make a Rilakkuma-style crochet keychain.
2. Crochet Bear with Daisy
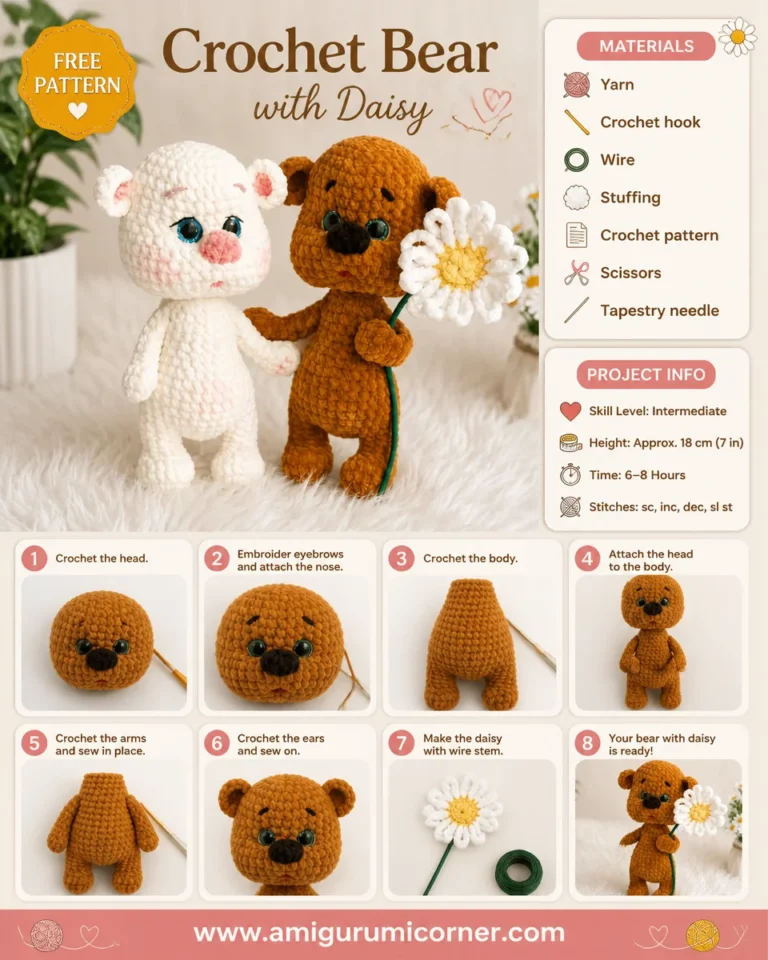
The Crochet Bear with Daisy is a sweet and playful design featuring a warm brown teddy bear holding a handmade white daisy.
The flower accessory gives this amigurumi a charming handmade look and makes it especially cute as a gift.
Materials
- Brown yarn
- White yarn
- Yellow yarn
- Green yarn
- Crochet hook
- Stuffing
- Safety eyes
- Yarn needle
- Scissors
- Floral wire, if desired
Step-by-Step Instructions
Step 1: Crochet the teddy bear’s head.
Step 2: Add the safety eyes and embroidered facial details.
Step 3: Crochet the rounded body.
Step 4: Make the arms, legs, and ears.
Step 5: Sew all the bear pieces together.
Step 6: Crochet the daisy petals using white yarn.
Step 7: Add a yellow center to the flower.
Step 8: Create a small green stem.
Step 9: Place the daisy in the bear’s paw and secure it carefully.
Decorating Tip
Try adding a small bow, flower crown, or scarf to create your own personalized crochet teddy bear.
3. Crochet an Amigurumi Teddy Bear
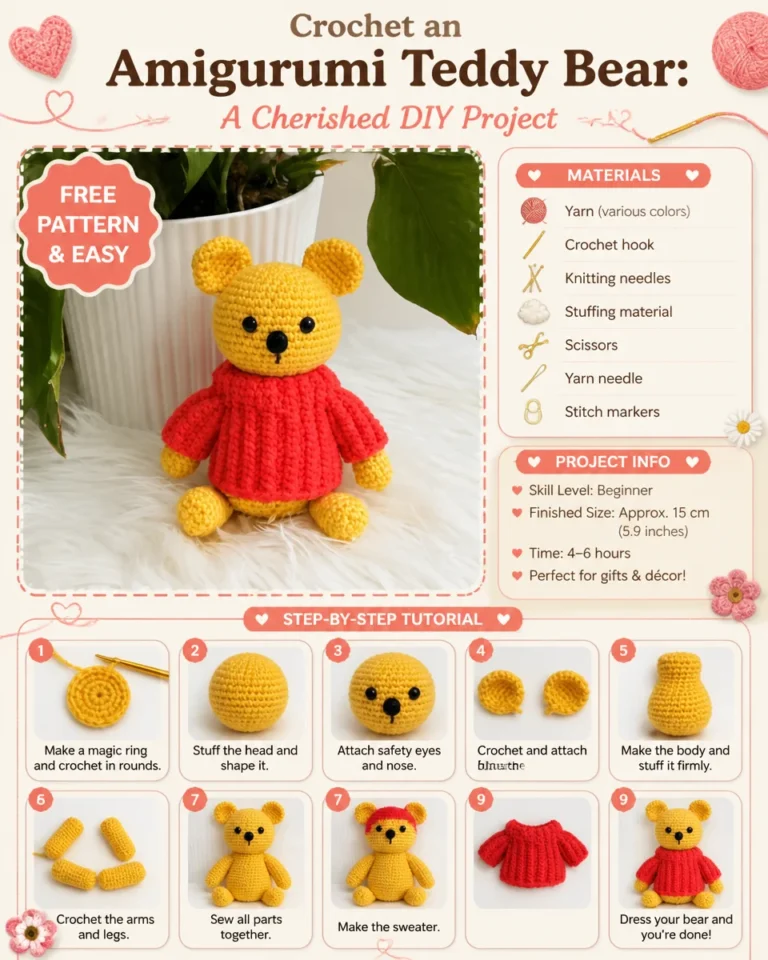
This Crochet an Amigurumi Teddy Bear: A Cherished DIY Project is a classic teddy bear design with a cheerful yellow body and a bright red sweater.
The clothing makes this project especially fun because you can easily change the sweater color to match your favorite style.
Materials
- Yellow or golden yarn
- Red yarn
- Crochet hook
- Fiberfill stuffing
- Safety eyes
- Yarn needle
- Stitch markers
- Scissors
Step-by-Step Instructions
Step 1: Start by crocheting the teddy bear’s head.
Step 2: Add the safety eyes and small embroidered nose.
Step 3: Crochet the ears and attach them to the head.
Step 4: Crochet the body and stuff it firmly.
Step 5: Make the arms and legs.
Step 6: Sew the bear’s parts together.
Step 7: Crochet a small red sweater.
Step 8: Dress the teddy bear in the sweater.
Step 9: Adjust the arms and legs so the bear sits naturally.
Personalization Ideas
You can make the sweater in pink, green, blue, cream, or any other color. Adding a tiny hat or scarf can also give the bear a completely different personality.
4. Crochet a Cozy Amigurumi Teddy Bear
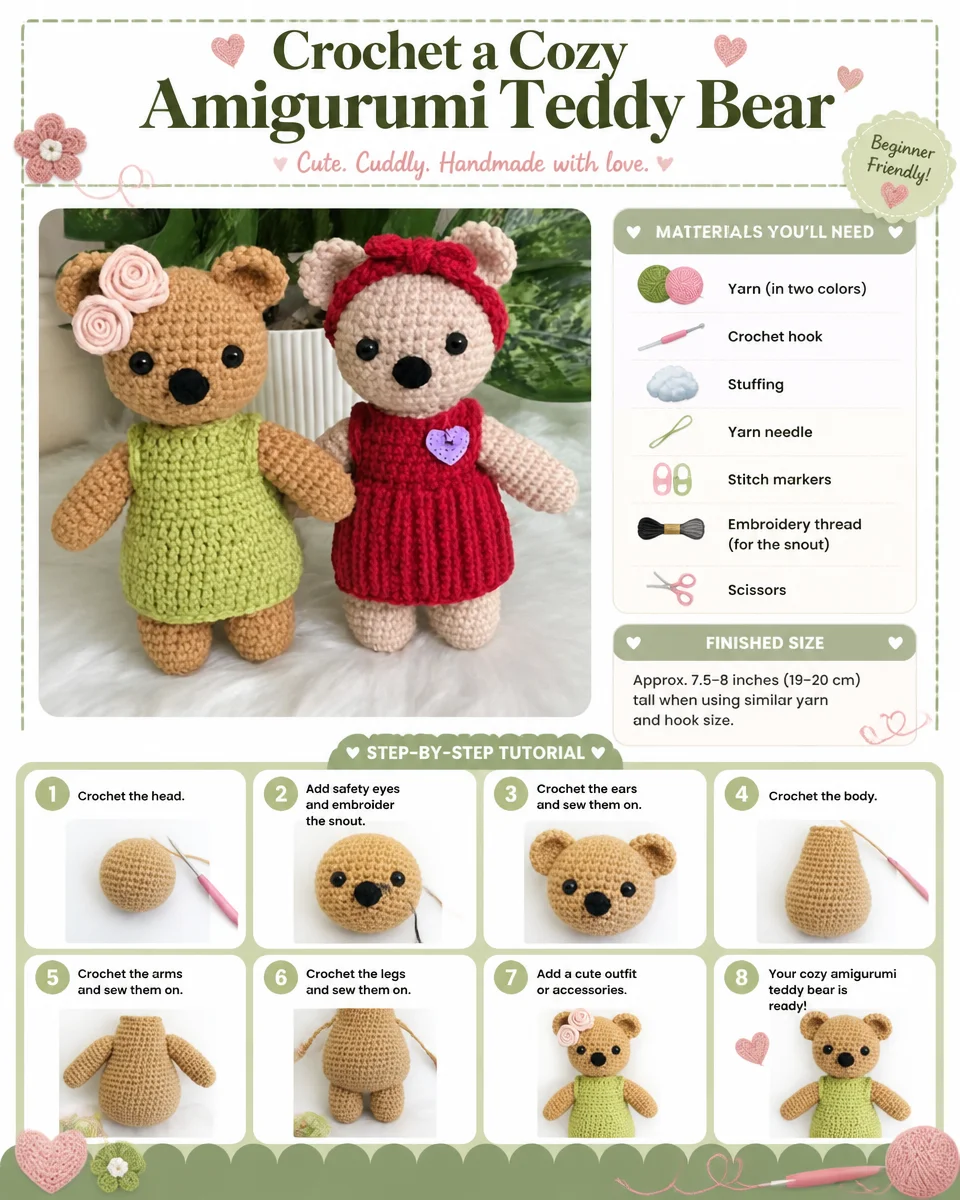
The Crochet a Cozy Amigurumi Teddy Bear is a lovely design for anyone who enjoys creating soft, cuddly handmade toys.
This pattern features two adorable teddy bears wearing colorful outfits and cute accessories. The simple body shapes make it easy to experiment with different clothes and decorations.
Materials
- Tan or brown yarn
- Pink, green, or red yarn for clothing
- Crochet hook
- Stuffing
- Safety eyes
- Embroidery thread
- Yarn needle
- Stitch markers
- Scissors
Step-by-Step Instructions
Step 1: Crochet the teddy bear’s head.
Step 2: Attach the safety eyes and embroider the snout.
Step 3: Crochet the ears and sew them onto the head.
Step 4: Crochet the body.
Step 5: Make the arms and legs.
Step 6: Sew the arms and legs securely onto the body.
Step 7: Create a cute outfit or accessory.
Step 8: Add flowers, bows, hearts, or other decorative details.
Step 9: Weave in all loose yarn ends and check that every piece is securely attached.
Tips for Making Crochet Teddy Bears
Keep Your Stitches Consistent
Even tension helps create smooth, professional-looking amigurumi. Try to keep your stitches tight enough that the stuffing does not show.
Stuff Gradually
Add stuffing as you crochet instead of waiting until the very end. This helps you control the shape of the head and body.
Place the Facial Features Carefully
The eyes and muzzle can completely change the expression of your teddy bear. Position everything first before sewing it permanently.
Experiment With Clothing
One simple teddy bear can become many different characters just by changing its clothes. Try sweaters, dresses, scarves, bows, or tiny hats.
Make Different Sizes
Use thicker yarn and a larger hook for a bigger cuddly bear, or thinner yarn for a tiny amigurumi.
Why You’ll Love These Crochet Teddy Bear Patterns
These teddy bear designs are:
- 🧸 Cute and beginner-friendly
- 🧶 Great for using different yarn colors
- 🎁 Perfect handmade gift ideas
- 🌸 Easy to personalize with accessories
- 💕 Fun for crochet lovers of different skill levels
- 🏡 Great for decorating bedrooms, nurseries, and craft spaces
Final Thoughts
These 4 Cute Crochet Teddy Bear Amigurumi Patterns are a fun way to create charming handmade bears with plenty of personality. Whether you choose the Free Crochet Rilakkuma Amigurumi Pattern, the Crochet Bear with Daisy, the colorful sweater bear, or the Crochet a Cozy Amigurumi Teddy Bear, each design gives you plenty of room to add your own creative touches.
Grab your favorite yarn and crochet hook, choose your favorite bear, and start creating a sweet handmade amigurumi that you can keep, gift, or display.
