

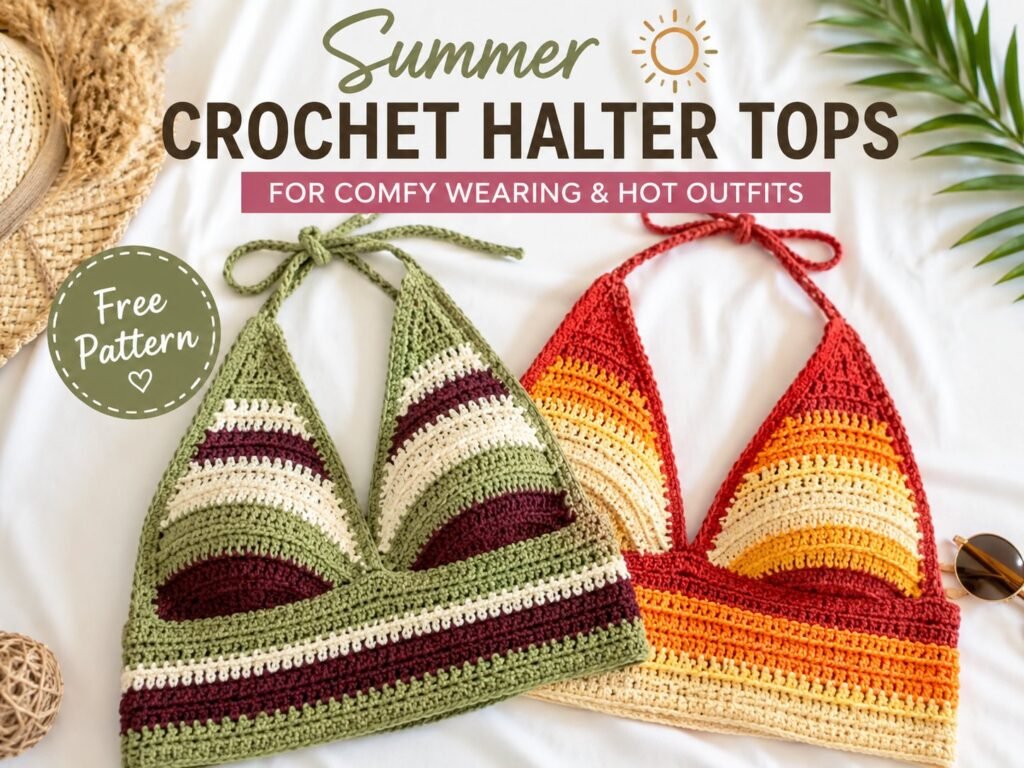
Summer is the perfect season to bring handmade crochet fashion into your wardrobe. These summer crochet halter tops are lightweight, stylish, comfortable, and easy to pair with jeans, shorts, skirts, or beachwear. With colorful stripes, a flattering halter neckline, and a fitted cropped shape, they make a beautiful DIY crochet project for warm-weather outfits.
The two designs shown in the inspiration photo feature a simple triangular halter construction with a wide crochet band around the waist. One uses soft green, white, and burgundy stripes, while the other combines bright red, orange, and yellow shades for a warm summer look.
Whether you are a beginner looking for a fun crochet clothing project or an experienced crocheter wanting to create a custom summer top, this style is a great choice.
Materials You’ll Need
For this crochet halter top, you will need:
- Lightweight cotton or cotton-blend yarn in 2–4 colors
- Crochet hook suitable for your yarn
- Yarn needle
- Scissors
- Measuring tape
- Stitch markers
- Optional: a few safety pins for checking the fit
Cotton yarn is especially suitable for summer crochet tops because it is breathable, lightweight, and comfortable against the skin.
How to Crochet a Summer Halter Top
Step 1: Choose Your Size and Take Measurements
Before starting, measure your bust, underbust, and desired top length. The finished top should fit comfortably around the bust without being excessively tight.
Measure from the center of the bust to the desired lower edge of the top. Also measure the distance from the bust to the neck so you can create halter straps that sit comfortably.
Tip: Make a small crochet swatch first to check your gauge. This will help you adjust the hook size or stitch count before making the full top.
Step 2: Crochet the First Triangle Cup
Start with the yarn color you want for the center of the top.
Chain a small foundation and work crochet stitches back and forth, increasing gradually toward the outer edges. The increases create the triangular shape needed for the halter cup.
Continue adding stitches at the appropriate edges until the triangle reaches your desired bust width.
Keep your stitches even so the finished cup has a smooth shape.
Step 3: Create the Second Cup
Repeat the same process for the second side.
Try to keep both cups identical in size and stitch count. If you are using several colors, change yarn at the same points on both cups to create a balanced striped design.
For the look shown in the inspiration photo, alternating narrow stripes gives the top a colorful handmade appearance.
Step 4: Add the Halter Straps
Once both triangular cups are complete, crochet the straps extending from the upper corners.
You can make the straps using simple rows of single crochet or another sturdy stitch. Continue until each strap is long enough to tie comfortably behind the neck.
For extra comfort, avoid making the straps too thin. A slightly wider strap can provide better support and create a polished finish.
Step 5: Join the Cups
Position the two crochet cups next to each other and check the neckline placement.
Join the inner edges using slip stitches, single crochet, or a neat sewing method with a yarn needle.
Leave enough space between the cups for the neckline to create the flattering V-shaped halter look.
Try the top on before finishing the lower section so you can adjust the cup position if necessary.
Step 6: Crochet the Underbust Band
Now work across the bottom of both cups to create the wide underbust band.
Continue crocheting rows around the lower edge until you reach your preferred length. The inspiration design uses several horizontal rows of contrasting colors, which creates a beautiful striped effect.
You can use:
Single crochet for a firm fabric
Half double crochet for a little more flexibility
Double crochet for a lighter and more open texture
Keep checking the fit as you work. The band should sit comfortably around the ribcage without digging into the skin.
Step 7: Add Colorful Stripes
To recreate the colorful summer aesthetic, alternate your yarn colors every one or two rows.
For a soft and feminine version, try:
Sage green + white + burgundy
For a bright and playful version, try:
Red + orange + yellow
You can also use pastel pink, cream, lavender, sky blue, or peach for a lighter summer palette.
When changing colors, make the transition neatly and weave in the ends as you go or finish them all at the end.
Step 8: Finish the Edges
Work one final round around the neckline, cups, straps, and lower edge.
A simple single crochet border can make the entire crochet halter top look cleaner and more finished.
Pay special attention to the edges around the cups because a neat border helps maintain the shape of the top.
Step 9: Add the Final Ties
If you prefer an adjustable fit, add longer ties to the back of the underbust band.
This makes the top easier to adjust and allows you to customize the fit around your body.
Secure all yarn ends carefully with a yarn needle and trim any excess yarn.
Step 10: Block and Try On
Gently wet-block the finished crochet top if your yarn allows it.
Shape the cups and band while damp and allow the piece to dry completely. Blocking can help even out the stitches and improve the overall shape.
Once dry, try on your finished summer crochet halter top and make any small adjustments needed for the straps or fit.
Easy Ways to Style a Crochet Halter Top
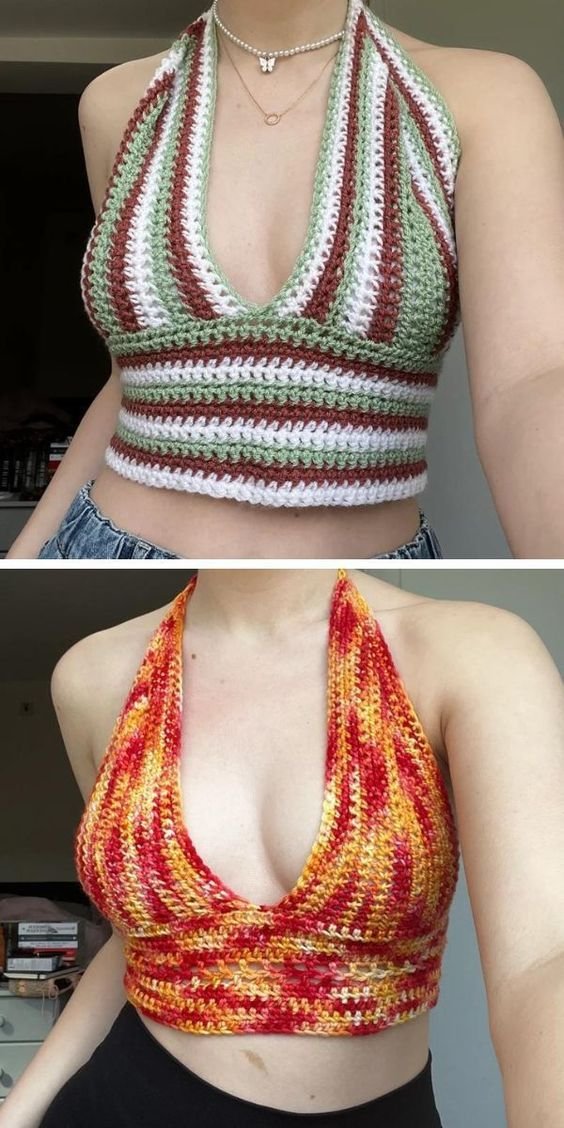
A handmade crochet halter top can be styled in many different ways for summer.
Pair it with high-waisted denim jeans for a casual everyday outfit. For a beach-inspired look, wear it with a flowy skirt, shorts, or lightweight linen pants.
You can also layer the top over a simple camisole or fitted tank if you prefer more coverage. Add sandals, a woven bag, sunglasses, and simple jewelry for an effortless warm-weather outfit.
Crochet Halter Top Color Ideas
The beauty of making your own crochet clothing is that you can completely customize the colors.
Try sage green and cream for a soft natural look, red and orange for a bold summer outfit, pink and white for a feminine style, or blue and cream for a fresh beach-inspired design.
A solid-color halter top can also look beautiful when made with textured stitches or a decorative border.
Tips for Making a Better-Fitting Crochet Top
Always check your measurements before beginning the main project. Crochet stretches differently depending on the yarn, stitch, and tension, so measuring the finished piece is more reliable than depending only on stitch counts.
Make the cups slightly adjustable if possible, especially if you are creating the top as a gift.
Choose breathable yarn for hot weather and avoid very heavy yarns that can make the garment uncomfortable.
If you want more support, use tighter stitches and make the underbust band slightly wider.
For a more relaxed fit, use a flexible stitch and add adjustable ties.
Final Thoughts
This summer crochet halter top is a fun way to create a stylish handmade piece while experimenting with colors and crochet stitches. The triangular cups, halter straps, and striped underbust band create a flattering silhouette that works beautifully for casual summer outfits, vacations, festivals, and beach days.
With the right yarn and measurements, you can easily customize the colors, length, straps, and fit to create your own unique crochet halter top.
Whether you choose soft neutral stripes or bright tropical colors, this DIY crochet clothing project is a beautiful addition to a handmade summer wardrobe.
