

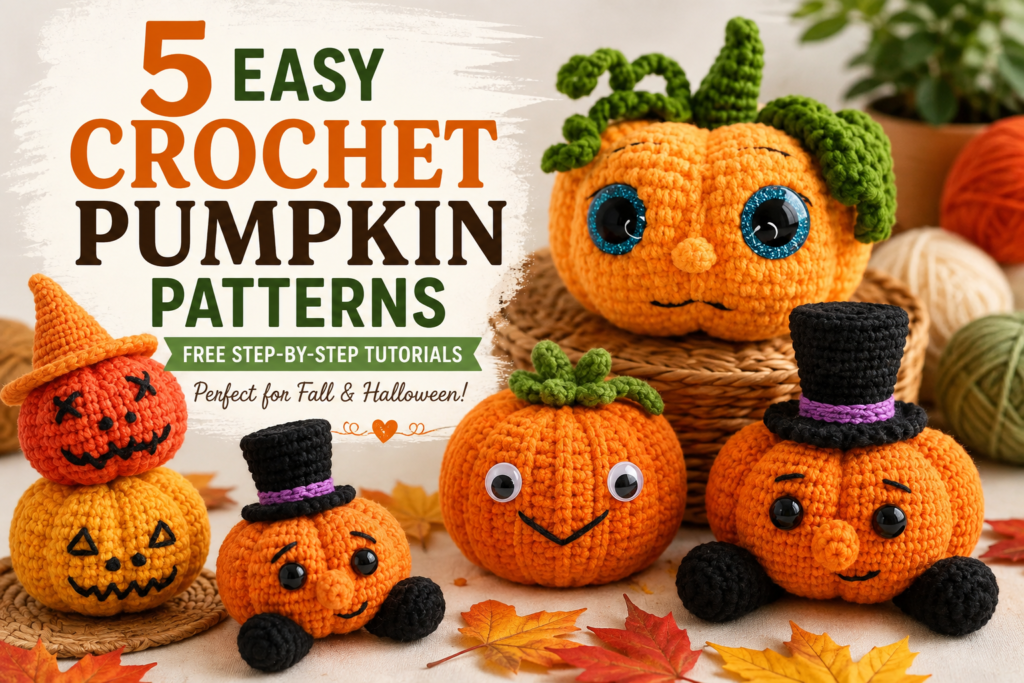
Crochet pumpkins are a fun way to bring handmade charm to your fall and Halloween décor. Whether you’re a beginner or already enjoy making amigurumi, these pumpkin projects give you several cute styles to try.
From a simple Crochet Pumpkin Pattern to a fun Halloween character with a tiny hat, each design can be customized with different yarn colors and decorative details.
In this collection, you’ll find 5 crochet pumpkin patterns, including materials, project information, and easy step-by-step instructions inspired by the designs shown in the tutorials.
1. Free Crochet Halloween Pumpkin Pattern
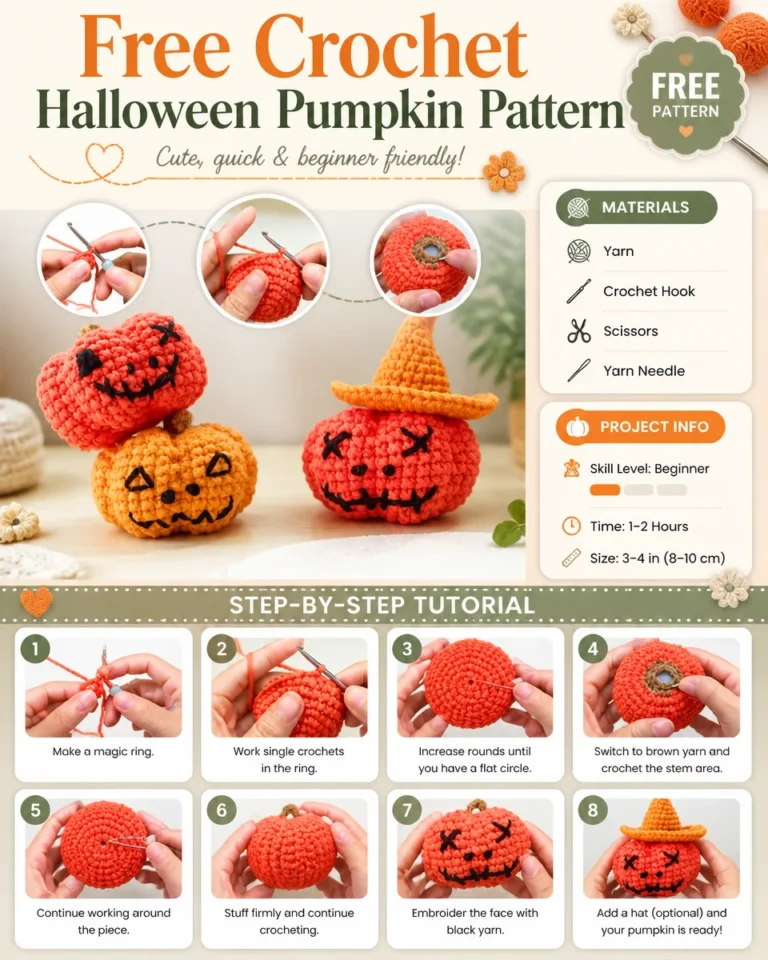
This Free Crochet Halloween Pumpkin Pattern is a cute beginner-friendly project for Halloween. The design features small pumpkins with spooky embroidered faces, and you can even add a little crochet witch hat for extra character.
Materials
- Orange crochet yarn
- Crochet hook
- Scissors
- Yarn needle
- Brown yarn for the stem
- Black yarn for the face
Project Information
- Skill Level: Beginner
- Time: 1–2 hours
- Finished Size: Approximately 3–4 inches
Step-by-Step Tutorial
Step 1: Make a Magic Ring
Start with orange yarn and create a magic ring.
Step 2: Work Single Crochet Stitches
Work single crochet stitches into the magic ring.
Step 3: Increase the Pumpkin
Continue working in rounds and add increases until you have a flat circular shape.
Step 4: Add the Stem Area
Change to brown yarn and begin crocheting the stem area at the top.
Step 5: Continue Around the Pumpkin
Keep crocheting around the piece to build the pumpkin body.
Step 6: Stuff the Pumpkin
Add stuffing while continuing to crochet. Make sure the pumpkin is filled firmly but not overly stretched.
Step 7: Embroider the Face
Use black yarn to create the eyes and mouth. Try a spooky Halloween expression or a cute smile.
Step 8: Add a Hat
For an extra Halloween touch, add a small crochet witch hat to the top of your pumpkin.
Your cute Halloween pumpkin is ready!
2. Crochet Pumpkin Pattern
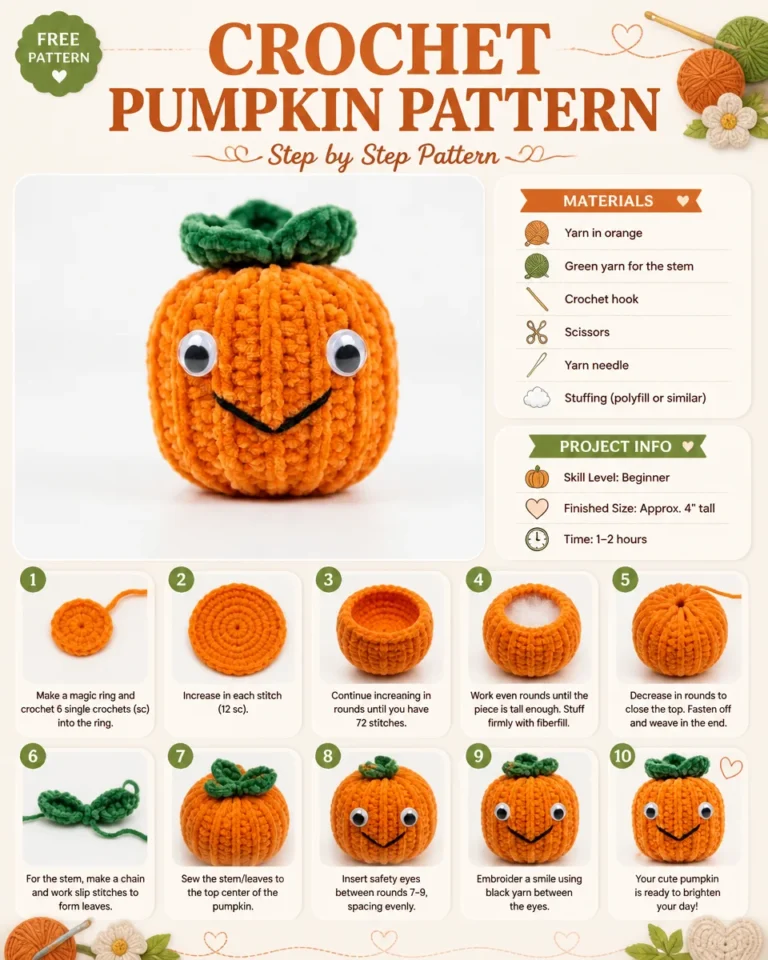
The Crochet Pumpkin Pattern is a classic fall project with a bright orange pumpkin body, green stem, and cute face. It’s a simple design that works especially well for beginners.
Materials
- Orange yarn
- Green yarn for the stem
- Crochet hook
- Scissors
- Yarn needle
- Stuffing
Project Information
- Skill Level: Beginner
- Finished Size: Approximately 4 inches tall
- Time: 1–2 hours
Step-by-Step Tutorial
Step 1: Make a Magic Ring
Start with orange yarn and crochet a magic ring.
Work 6 single crochet stitches into the ring.
Step 2: Increase the Circle
Continue crocheting in rounds and increase evenly around the piece.
Step 3: Continue Increasing
Keep increasing until the crochet circle reaches the desired width.
Step 4: Build the Pumpkin
Continue working even rounds so the sides begin to rise and form the pumpkin shape.
Step 5: Decrease the Top
Begin decreasing your stitches to close the top of the pumpkin.
Add stuffing before the opening becomes too small.
Step 6: Make the Stem and Leaves
Use green yarn to crochet a small stem and leaves.
Step 7: Add the Face
Attach safety eyes or embroider the eyes with black yarn. Add a simple smiling mouth.
Step 8: Finish the Pumpkin
Secure the top, weave in the yarn ends, and gently shape the pumpkin.
Your classic crochet pumpkin is finished!
3. Cozy Pumpkin Softie Crochet Pattern
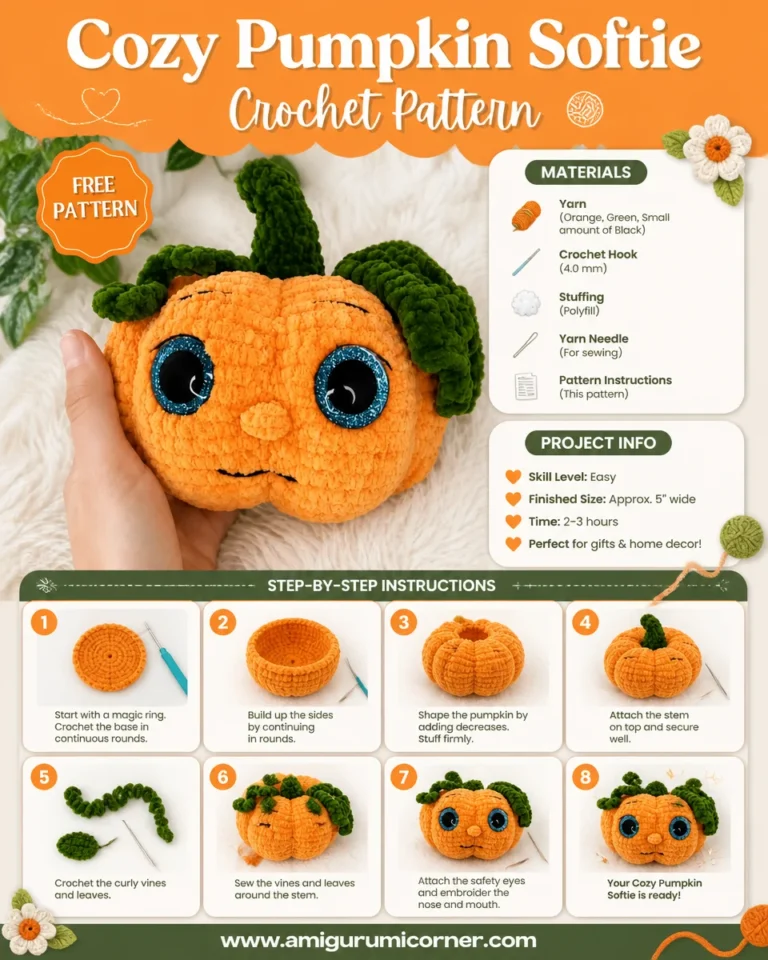
The Cozy Pumpkin Softie Crochet Pattern creates a soft, chunky-looking pumpkin with adorable facial features and decorative green vines. This design is perfect for fall decorations, handmade gifts, or a cozy seasonal display.
Materials
- Orange yarn
- Green yarn
- Small amount of black yarn
- 4.0 mm crochet hook
- Stuffing
- Yarn needle
- Scissors
Project Information
- Skill Level: Easy
- Finished Size: Approximately 5 inches wide
- Time: 2–3 hours
- Perfect for: Gifts and home décor
Step-by-Step Instructions
Step 1: Crochet the Base
Start with orange yarn and create a magic ring.
Work continuous rounds to build the base of the pumpkin.
Step 2: Build the Sides
Continue crocheting around the base until the pumpkin begins to become taller.
Step 3: Shape the Pumpkin
Use decreases near the top to create the rounded pumpkin shape.
Add stuffing as you work.
Step 4: Attach the Stem
Crochet a small green stem and attach it securely to the top.
Step 5: Crochet the Curly Vines
Using green yarn, create small curly vines and leaves.
Step 6: Sew on the Leaves
Arrange the leaves and vines around the stem and sew them securely onto the pumpkin.
Step 7: Add the Face
Attach the eyes and embroider the nose and mouth.
Step 8: Finish the Softie
Close the opening, secure all yarn ends, and gently shape your finished pumpkin.
4. Amigurumi Pumpkin Crochet Pattern
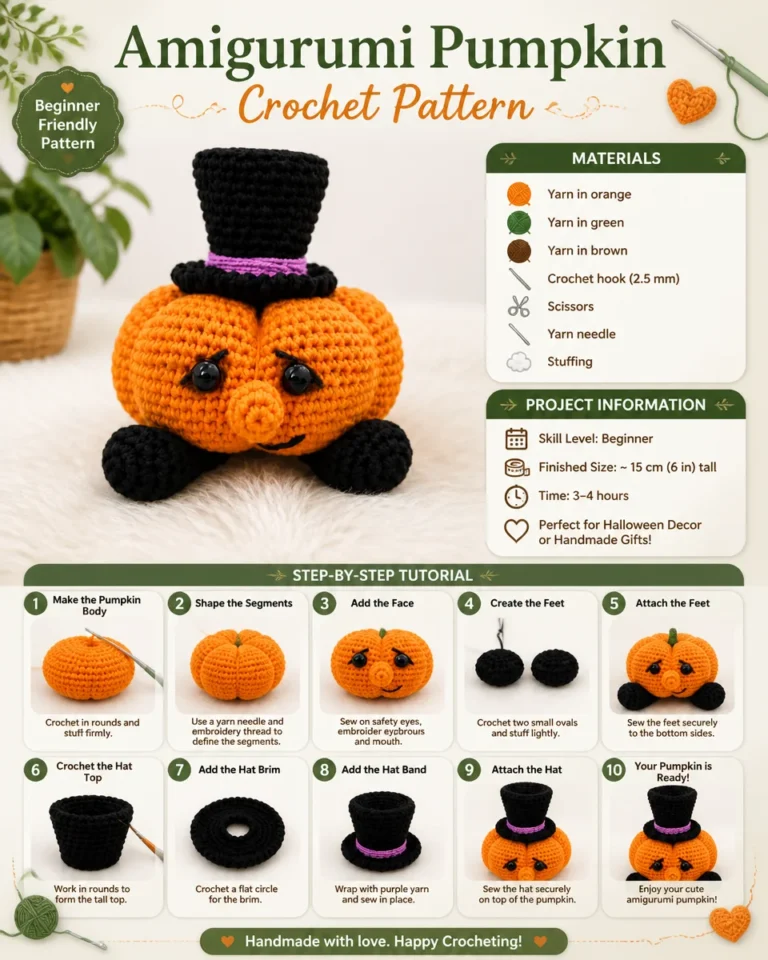
The Amigurumi Pumpkin Crochet Pattern features an adorable orange pumpkin character with black feet and a tall black top hat. The purple band around the hat adds a fun Halloween detail.
Materials
- Orange yarn
- Green yarn
- Brown yarn
- Black yarn
- 2.5 mm crochet hook
- Stuffing
- Yarn needle
- Scissors
Project Information
- Skill Level: Beginner
- Finished Size: Approximately 15 cm / 6 inches tall
- Time: 3–4 hours
- Perfect for: Halloween décor or handmade gifts
Step-by-Step Tutorial
Step 1: Make the Pumpkin Body
Crochet the pumpkin body in rounds using orange yarn.
Add stuffing as you work.
Step 2: Shape the Segments
Use a yarn needle and embroidery thread to define the pumpkin sections.
Gently pull the yarn to create the characteristic pumpkin ridges.
Step 3: Add the Face
Sew on the safety eyes and embroider the eyebrows and mouth.
Step 4: Create the Feet
Crochet two small black ovals and stuff them lightly.
Step 5: Attach the Feet
Sew the feet securely to the bottom sides of the pumpkin.
Step 6: Crochet the Hat Top
Using black yarn, work in rounds to create the tall top section of the hat.
Step 7: Add the Hat Brim
Crochet a flat black circle to create the brim.
Step 8: Add the Hat Band
Wrap purple yarn around the hat and secure it in place.
Step 9: Attach the Hat
Place the finished hat on top of the pumpkin and sew it securely.
Step 10: Finish Your Pumpkin
Check all attachments, weave in the remaining yarn ends, and shape the finished amigurumi.
5. Amigurumi Pumpkin Free Halloween Pattern
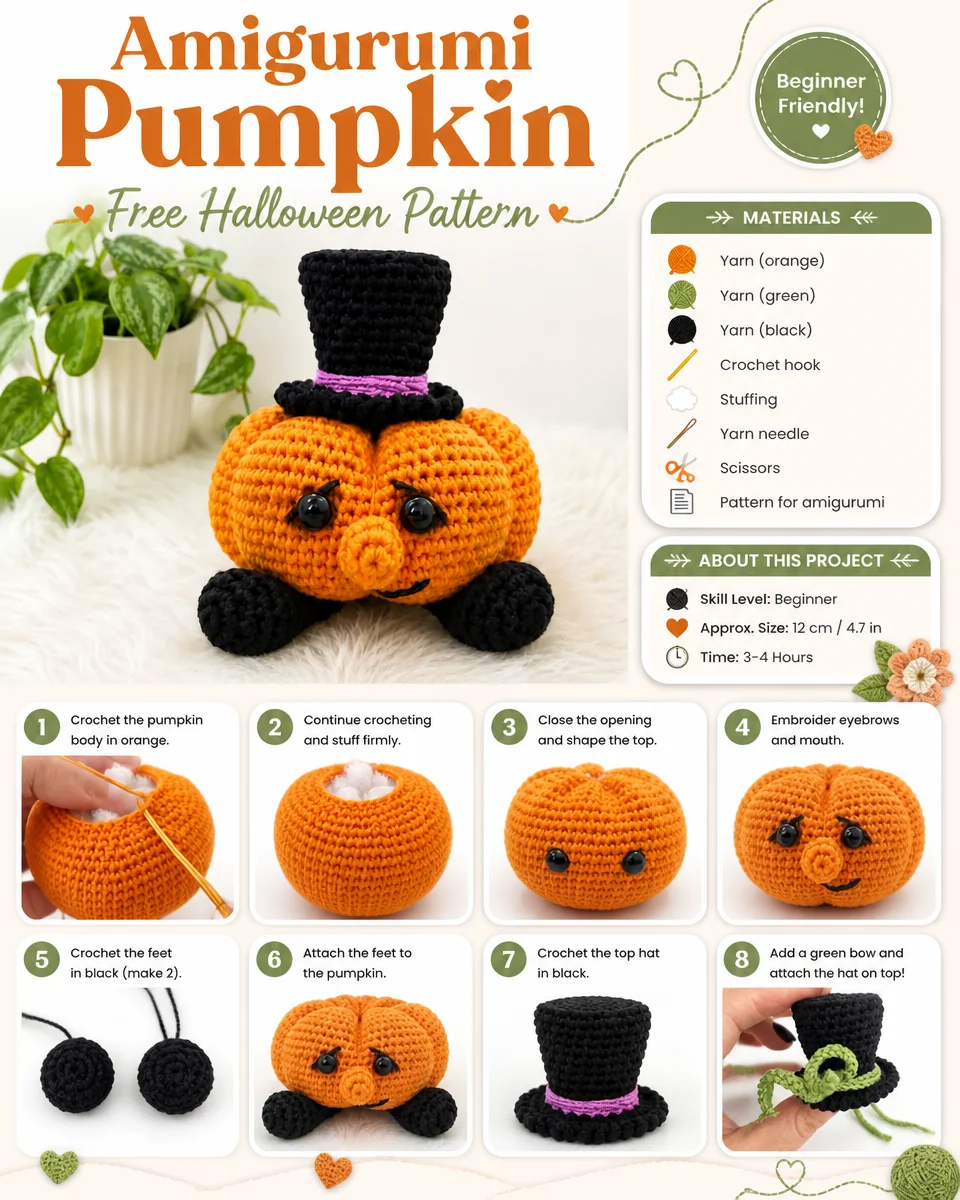
The Amigurumi Pumpkin Free Halloween Pattern is another adorable Halloween-inspired pumpkin design. It combines a round orange pumpkin body with black feet, a tall black hat, and a small green decorative detail.
Materials
- Orange yarn
- Green yarn
- Black yarn
- Crochet hook
- Stuffing
- Yarn needle
- Scissors
- Yarn for the decorative hat band
Project Information
- Skill Level: Beginner Friendly
- Finished Size: Approximately 12 cm / 4.7 inches
- Time: 3–4 hours
Step-by-Step Instructions
Step 1: Crochet the Pumpkin Body
Begin crocheting the pumpkin body with orange yarn.
Work in rounds until the body reaches the desired size.
Step 2: Continue Crocheting and Stuff
Continue working the rounds and gradually add stuffing.
Keep the pumpkin firm and evenly shaped.
Step 3: Close the Opening
Decrease the final rounds to close the opening.
Shape the top gently to create the pumpkin form.
Step 4: Embroider the Face
Add the eyes and embroider the eyebrows and mouth using black yarn.
Step 5: Crochet the Feet
Make two small black crochet feet.
Stuff them lightly and close the openings.
Step 6: Attach the Feet
Sew the feet securely onto the bottom of the pumpkin.
Step 7: Crochet the Top Hat
Using black yarn, crochet the tall top section of the hat.
Then create the brim separately.
Step 8: Add the Green Decoration
Add a small green bow or decorative detail to the hat.
Step 9: Attach the Hat
Secure the finished hat to the top of the pumpkin.
Step 10: Your Pumpkin Is Ready!
Give the pumpkin a final shape, secure all loose ends, and enjoy your handmade Halloween decoration.
Tips for Making Crochet Pumpkins
Keep Your Tension Consistent
Consistent tension helps your pumpkin maintain a smooth and even shape.
Don’t Overstuff
Add stuffing gradually. Too much stuffing can stretch the stitches and make the pumpkin look uneven.
Use Stitch Markers
When working in continuous rounds, a stitch marker can help you keep track of where each round begins.
Shape the Pumpkin
Use a yarn needle and a length of yarn to create subtle vertical sections and give the pumpkin more definition.
Secure Small Details
Make sure eyes, feet, hats, stems, and other decorative pieces are securely attached.
Easy Crochet Pumpkin Color Ideas
You can customize these patterns with different colors to match your home décor.
Traditional Halloween: Orange, black, green, and purple
Cozy Fall: Orange, cream, brown, and sage
Neutral: Beige, ivory, taupe, and rust
Cute Pastel: Peach, cream, pink, and soft green
Classic Pumpkin: Bright orange with a green stem
How to Use Crochet Pumpkins
These handmade pumpkins are perfect for:
- Halloween decorations
- Fall home décor
- Mantel displays
- Table centerpieces
- Bookshelves
- Handmade gifts
- Seasonal craft markets
- Cozy autumn displays
You can also make several pumpkins in different sizes and arrange them together for a beautiful seasonal decoration.
Frequently Asked Questions
Are these crochet pumpkin patterns beginner-friendly?
Yes. Several of these designs are specifically labeled Beginner or Beginner Friendly, while the Cozy Pumpkin Softie is labeled Easy.
What yarn should I use?
The pictured designs use different yarn types, so choose a yarn that matches the look and size you want. Orange yarn is the main color for all five pumpkin projects.
Do I need stuffing?
For the three-dimensional pumpkin and amigurumi designs, stuffing helps create the rounded shape.
Can I change the colors?
Absolutely. You can change the pumpkin, stem, face, hat, and decorative colors to create your own style.
Can I make these pumpkins for Halloween gifts?
Yes. Small crochet pumpkins make cute handmade seasonal gifts and decorations.
Final Thoughts
These 5 crochet pumpkin patterns are a fun way to bring handmade style into your fall and Halloween projects.
Start with the Free Crochet Halloween Pumpkin Pattern or the Crochet Pumpkin Pattern if you want a simple beginner project. When you’re ready for something more character-filled, try the Cozy Pumpkin Softie Crochet Pattern, Amigurumi Pumpkin Crochet Pattern, or Amigurumi Pumpkin Free Halloween Pattern.
Grab your orange yarn, crochet hook, and stuffing, and create your favorite pumpkin for the season. 🎃🧶🍂
